|
|
This page describes how to take apart super soakers, how to repair common breakages, and how to put them back together. Though we've had excellent results, restoring guns to close to their original specifications, we can't take responsibility for anything you do to your gun. We wouldn't take a gun apart unless it was broken either. Simply disassembling your gun probably voids its warranty too.
All of the discussion is solely focused on repairing; we will not discuss how to "modify" your gun to perform differently. Why? Well, the tank of a modified XP exploded in someone's face... Not a pleasant experience. We're pretty hard core, and we don't see any need to mess with the designs that Larami makes-- they work great!
If your gun still operates fine but there's something cosmetically broken (i.e., the loop that the neck strap attaches to broke off), it's easy to glue back on. Begin by cleaning the surface if necessary. Then, get some coarse sandpaper and rough up the area. Glue will not bond to smooth plastic surfaces. Then, break out your favorite kind of epoxy (a special "made for plastc" waterproof epoxy is available for a couple bucks at Sears). Apply liberally and let it sit for the recommended curing time (24 hours for our favorite variety.) It's really worth your effort to buy good epoxy. Don't borrow your buddy's old general purpose hobbiest epoxy-- get the waterproof epoxy made for plastic.
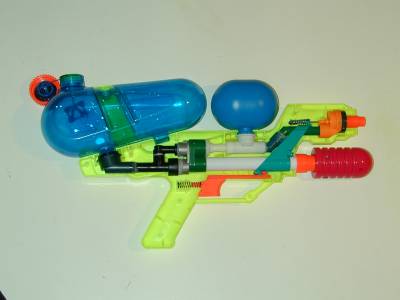
To fix or dissect a supersoaker, you'll have to get at its guts. Most super soakers have similar constructions: two plastic halves which are attached with screws and occasionally glue. There will sometimes be large plastic O shaped pieces which also hold the two halves together.
To put the gun back together, just screw everything back together and replace the plastic O rings (if possible). Don't wory about glue-- the guns don't really need glue to stay together.
Most of the models follow the same pattern. There's a pump, reservoirs, a nozzle, and tubing to connect them all. A metal rod extends from the nozzle. When it is pulled back, the nozzle opens and the gun fires. However, the metal rod is spring-loaded, so when the rod isn't actively being pulled back (via the trigger), the valve closes and the gun stops firing.
|
|
 |
 |
| The XP-75's design is different from the 40 and 70's, and is, in our opinion, quite inferior. The trigger is not formed from a single piece of sturdy plastic, but rather is attached through several rods. While "cute", it breaks easily (see below.) | |
One problem we've encountered is when the gun is stuck in the "firing" mode. This is caused by the spring in the valve assembly not drawing the metal valve rod back into the assembly completely, thus leaving the valve open. It can be easily "patched" by using a small rubber band. Attach the rubber band as shown (this is an XP-70 but a similar technique could be adapted for other designs). The rubber band helps push the valve rod back forward. It's not a permenant fix, but it's simple and cheap, and can always be done again when the rubber band breaks or slips off.
 |
 |
| Adding a rubber band at the indicated location can fix a gun that can not stop firing by helping push the valve rod back into the valve assembly, closing the valve. | |
The XP75's complex and awkward firing mechansim is prone to breakage. The plastic pieces are subjected to substantial force, and they are not reinforced adequately. Thus, the can crack so that pulling the trigger no longer operates the valve rod (i.e., the gun can never fire.)
While Larami fixed this design problem by changing the firing mechanism altogether (see the XP40 and XP70), the best you can do to fix an XP75 is to reinforce the plastic pieces of the firing mechanism.
This might be the single most common problem. Almost all super soakers leak a little and it's not worthwhile to disassemble the sucker and fix it (fixing leaks can be hard.) On the other hand, if your gun leaks so badly that it doesn't build up pressure, or loses pressure quickly, or you get wet faster than the person you're shooting at, it's time to take some action.
CPS's could run into problems similar to those described above, such as leakage or a broken trigger. These issues can be resolved the same way they would be with a rifle-class gun. However, the problem we encountered with our CPS 2000 involved the pressure chamber. While pumping up the gun, we heard a loud pop, and the gun was no longer able to pressurize.
The best way to go about fixing this sort of problem is to take apart the gun, but don't disconnect any of the inner mechanisms. In other words, just take off the external cover. Then, put some water in the gun, and try pumping it. (Do this somewhere where you are not afraid to get wet--there's a good chance water will leak everywhere.) If this doesn't tip you off to the problem, try disconnecting individual components until you see where the failure is. Also, be systematic about the components you take apart--some won't go back together. Some things you can break, or even saw off, as long as they don't have to be air or water tight. Consult our How They Work page to get some idea as to what each component of the gun does.